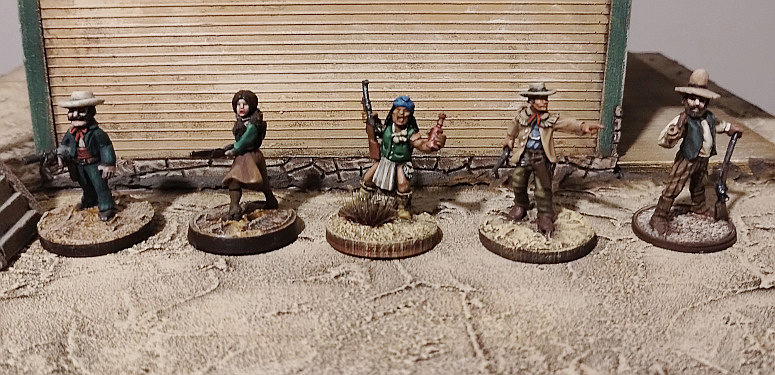
Over the years, I’ve painted Western figures from a wide variety of companies. Here’s a sampling.
For starters, I am by no means a master miniature painter. Far from it.
I’m usually satisfied with the paint job when I finish a minature. But I still gaze at miniatures painted by others with envy, thinking, ‘Wow, I wish I could do that.’
Still, I’ve learned a trick or two after decades of painting little soldiers. And I figured I’d pass some of them along as part of this blog. Especially since I’m running out of new Westerns to add.
Many of the painting blogs that follow will lay out the paint selections and recipes I’ve used for my miniatures.
But so I don’t have to repeat myself over and over, I’ll cover some basics in this intro blog.
Painting flesh:
Males: For Old West figures, I’ve settled on one of two recipes.
1st: Cadian Fleshtone by Citadel; Wash with Reikland Fleshshade (Citadel Contrast), Cadian Fleshtone to lighten again, Kislev Flesh by Citadel for highlights
2nd: Vallejo paints unless noted. 1. Beige Brown. 2. Wash with Reikland Fleshshade (Citadel Contrast). 3. Orange Brown + Flat Flesh. 4. Flat Flesh
Females: I’ve never been satisfied with the above recipes on female figures. So I use the following for female figures, especially when the flesh on the model amounts to more than just face and hands.
Vallejo again: 1. Red Leather + Biege Red; 2. 1st Mix + More Biege Red; 3. Light Brown + Elf Skin; 4. 2nd Mix + More Elf Skin; 5. Flat Flesh; 6. Elf Skin
Painting guns:
I am not a fan of using a bright metallic color for the metal part of six-guns or rifles. I really don’t want that to be the focal point of the model. So I use the following paint mix.
Long-guns
The stock: 1. Vallejo Orange Brown; 2. Agrax Earthshade (Citadel Contrast) wash
The trigger, barrel, etc: 1. Vallejo Black; 2. Vallejo Natural Steel
Six-guns
Handle: 1. Any brown you choose; 2. Agrax Earthshade (Citadel Contrast) wash
Rest of gun: 1. Vallejo Black; 2. Vallejo Natural Steel
Shoes / Boots / Belts:
I paint most clothing on figures with a three-step method, a base, a mid-tone covering raised areas, a highlight covering smaller areas yet. That seems way too time-consuming for a gun belt or a pair of boots or shoes. Again, those are not going to be the focal point of your model.
So in the painting guides that follow, unless noted otherwise, I’ve done the following for those items.
1. Vallejo Saddle Brown; 2. Agrax Earthsade (Citadel Contrast wash)
Metal objects:
I tried lots of metallic paints from lots of different paint makers over the years. Now, I’m not fan of Citadel’s flip top on their paints. But I am a big fan of their metallics. If you want something silverish to stand out, use their Iron Hands Steel. If you want your gold object to pop, use their Retributor Armour.
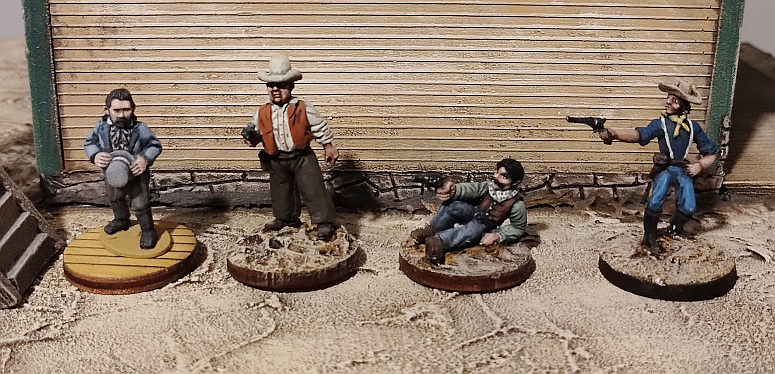
More samples from my 28mm Old West figure collection, each from a different company.
Citadel Contrast paints:
They’re designed as a time-saver, allowing you to paint your model with one coat of paint. Tried it. Didn’t like it. I have no finished models painted solely via that method.
However, they are a great substitute for black-lining your miniatures, something I always used to do to differentiate one clothing item from another, outline a belt, etc. And black-lining was a time-consuming pain-in-the-butt for someone who doesn’t have the steadiest hands around.
The contrast paint settles in recesses, making it perfect for that use. I generally prime my Old West minis with Citadel’s Zandri Dust or Krylon’s Ultra-Flat Khaki Camo spray paint. Sometimes, I’ll use contrast paints as a base color over portions of the miniatures or as a wash at some point in the process to create the black-lining effect.
Thinned down with Citadel Contrast Medium, they’re also great for dirtying up a light-colored piece of clothing since it’s unlikely your Old West outlaws have their laundry done on a regular basis.
The contrast paints are pretty pricey. I’d suggest trying for starters: Black Templar, Agrax Earthshade (a dark brown), Gore Grunta Fur (a medium brown), Skeleton Horde (a light brown), Reikland Fleshshade and the Contrast Medium.
Craft paints
Miniature paints are pretty pricey. My local Hobby Lobby charges $3.99 for a tiny bottle of Vallejo. I typically pay twice that for a pot of Citadel Contrast paint.
So when I’m dealing with larger terrain pieces, I switch to craft paints. And by craft paints, I mean the kind where you pay maybe a $1 for a tall plastic bottle. They work perfectly fine. And because they tend to be thicker in consistency when they come out of the bottle, they work very nicely for drybrushing, a technique I’ve come to use a lot more on terrain than miniatures these days.
So whenever you see Folk Art or Delta Creamcoast in my painting recipe, that’s what I’m referring to. The very cheap craft paint you can pick up in any Hobby Lobby or Wal-Mart. The former typically carries a wide range of colors.

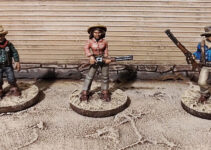
And yet more figures from my 28mm Old West collection. Again, each is from a different company.